Using custom recovery like TWRP, OrangeFox, Sky Hawk, etc. is the most popular way to root Android device. You can find lots of articles, videos on the internet about this. However, the main problem with this method is; these custom recoveries are not available for each Android device.
Now let assume that you want to root your Android device but no such custom recovery is available then how can you root your phone?
You might go for one-click root application like King root, Iroot, etc. But again these Android applications are not secure. Then how you can root your Android device securely?
Well, in this article I will show you how to root any Android device securely and without any custom recovery like TWRP, OrangeFox, etc.
Requirement:
To root your Android device without custom recovery, you must have
- Unlocked bootloader on your Android phone.
- A computer or laptop and USB cable.
- Necessary USB driver of your Android phone which needs to be installed on your computer or laptop.
- Stock or Recovery ROM of your Android device (Use google search to download these ROM).
Also Read: Things You Need To Know About The Android Bootloader
How To Root Android Phone Without Custom Recovery:
To understand “how to root any Android device without custom recovery like TWRP” in a better way, I divided the rooting process into three steps. Those are:
- Downloading the necessary files.
- Settings up the Android device for rooting.
- Taking requisite action to root Android device.
Download The Necessary Files:
In order to root an Android device without custom recovery, you have to download two files on your computer. The first one is “platform tools” and the second one is the stock or recovery ROM of your Android phone. Example: If you want to root Redmi5A then you have to download the stock ROM for this particular model.
Settings Up Your Android Phone For Rooting:
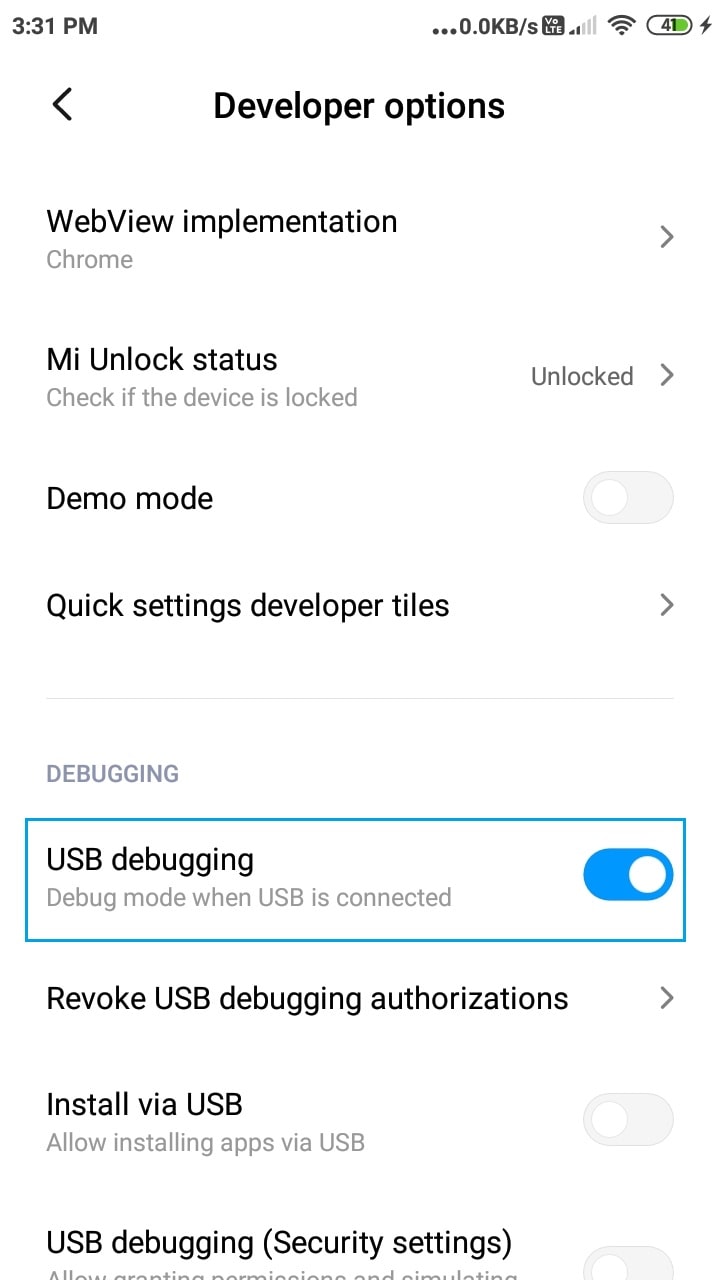
Firstly, you have to check whether the bootloader of your Android device is unlocked or not. If the bootloader is locked then unlock it. After unlocking the bootloader, you have to enable USB debugging on your Android phone. To enable USB debugging, navigate to Developer options and then tap on the button beside USB debugging.
Now download and install Magisk Manager on your android device.
Also Read:
How To Unhide, Enable, Disable and Hide Android Developer Options
How To Check The Bootloader Status Of Your Android Device Using ABD Commands
Requisite Action To Root Android Device:
Now the stage is set for rooting your Android device. However, for this, you have to follow the below instruction thoroughly.
- Firstly, you have to unzip the downloaded files on your computer.
- Find boot.img file inside the stock ROM folder and transfer this file on your Android phone (Remember the storage location of this file on your phone).
Now you have to patch the boot.img file using Magisk manager and flash the patched file to root your Android phone, for this:
- Open Magisk manager on your Android phone.
- Tap Install beside Magisk.
- Tick the box represent Preserve force encryption and then tap Next.
- Now choose Select and Patch a File and browse the boot.img file from your phone.
- After browsing the boot.img file tap on LET’S GO.
- Wait for the completion of the patching process.
- After completion of patching, the patched file is automatically stored inside the Download folder on the internal storage of your phone.
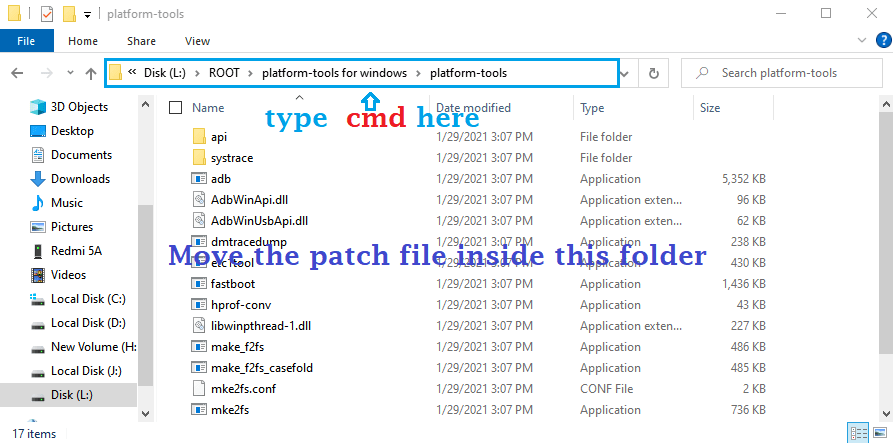
- Move the patched file inside the platform-tools folder on your computer.
- Now put your phone on Fastboot mode by pressing the Power and Volume down button together.
- Connect your phone to the computer using a USB cable.
- Go to your computer and navigate inside the platform tools folder.
- Type cmd on the address bar inside the platform tools folder.
- Once you have type cmd, press Enter. It will open command prompt windows.
- Now type the below commands one by one and press Enter.
fastboot devices
fastboot flash boot [file name.img]
*Replace file name by the name of the file that you patched early
fastboot reboot
Now your phone will restart automatically.
Boom!! your phone is now rooted successfully. You can check it by using the root checker application.
Conclusion:
Rooting any Android phone without custom recovery is the safest method of rooting as it possesses less chance of phone brick. Also, after rooting your phone in this way, you can install any custom recovery like TWRP, PitchBlack, Sky Hawk, OrangeFox, etc. on your Android device without a computer. If you want to know about how to install custom recovery after rooting Android device then comment below.


